

Description
- Brand: Hilscher
- Full Model Number: CIFX50-C0 / CIFX 50-CO
- Part Number: 1250.500
- System/Series Family: cifX PCI Communication Cards
- Core Function: PCI-based CANopen Master or Slave communication interface
- Top 3 Hardcore Specs: PCI bus | CANopen Master/Slave | netX 100 communication controller
- Memory: 8 MB SDRAM + 4 MB serial Flash EPROM
- CANopen Interface: ISO 11898, optically isolated
- CANopen Data Rate: 10 kbit/s to 1 Mbit/s
- Isolation: 1000 VDC test voltage
- Stock Status: New surplus, factory sealed, or fully tested refurbished subject to exact inventory confirmation
Important identification note: The CIFX50-C0 designation corresponds to the Hilscher CIFX 50-CO, part number 1250.500. It is not a GE-branded module. Hilscher’s official documentation identifies it as a PCI CANopen Master/Slave PC card.
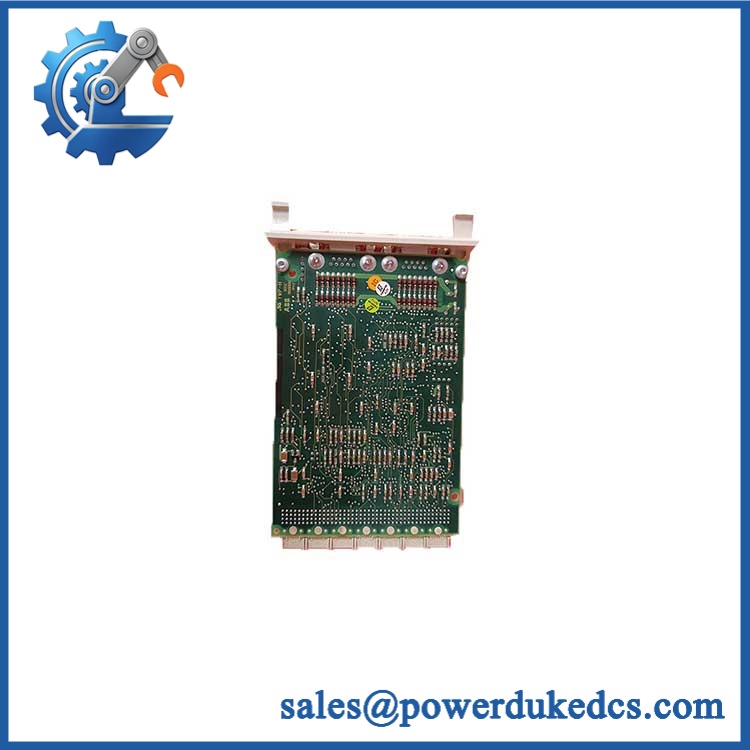
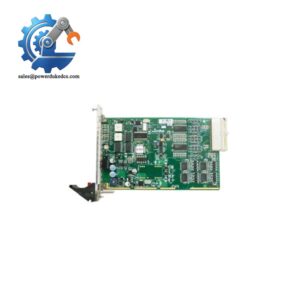
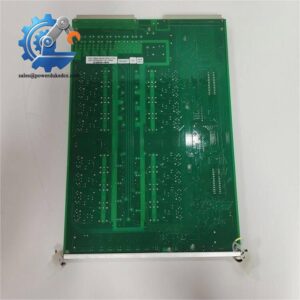
Hilscher CIFX50-C0
Module 3: Technical Product Introduction
A legacy industrial PC can remain fully functional while its fieldbus interface becomes the actual failure point. The Hilscher CIFX50-C0 / CIFX 50-CO provides a dedicated PCI communication interface for connecting a PC-based automation system to a CANopen network. The card uses Hilscher’s netX 100 communication controller and can operate as either a CANopen Master or Slave, depending on the loaded firmware and application configuration.
The hardware specification is specific enough to matter during replacement: PCI bus at 33 MHz, 32-bit data access, 64 KB Dual-Port Memory, 8 MB SDRAM, and 4 MB serial Flash EPROM. The CANopen interface supports transmission rates from 10 kbit/s through 1 Mbit/s, uses an optically isolated ISO-11898 interface, and provides a 9-pin male D-Sub connector. Hilscher specifies +3.3 VDC ±5% supply voltage and a maximum current consumption of approximately 650 mA at 3.3 V.
Module 4: Application Scenarios & Field Realities
- Inside an industrial PC running legacy automation software, the CIFX 50-CO can serve as the CANopen interface between the host application and distributed field devices. Before replacement, record the installed driver version, card ID, firmware, and CANopen configuration.
- For CANopen Master applications, the card can manage communication with distributed drives, I/O modules, sensors, and other CANopen nodes. The master license is a separate consideration; Hilscher lists NXLIC-MASTER, part number 8211.000, for master functionality.
- When used as a CANopen Slave, the card operates according to the loaded slave firmware and host configuration. Do not assume a card configured as a Master can be inserted into an existing Slave application without changing firmware and configuration.
- On older PCI-based automation computers, mechanical compatibility is only the first check. The replacement PC must still have a suitable PCI slot, and the operating system must support the required cifX device driver. A newer PCIe-only computer is not a direct hardware substitute.
Module 5: Migration, Compatibility & Installation Traps
Replacement Matrix
| Replacement Type | Assessment | Engineering Requirement |
|---|---|---|
| Drop-in Replacement | Yes, for an identical CIFX50-C0 / CIFX 50-CO installation | Match PCI interface, part number 1250.500, firmware role, card ID, and host driver |
| Software Compatible | Configuration-dependent | Verify cifX driver, firmware, CANopen configuration, EDS files, and Master/Slave role |
| Hardware Modification Required | Potentially required for PCI-to-PCIe migration | A PCI host slot is required for the original card; PCIe systems need a different hardware family |
Field Traps — Watch Out
1. CIFX50-C0 versus CIFX 50E: Do not confuse the PCI CIFX 50-CO with PCI Express variants. Hilscher identifies CIFX 50-CO as a PCI card, while the CIFX 50E family uses PCI Express. The slot interface must match the host computer.
2. Master license: The hardware supports CANopen Master and Slave operation, but Hilscher separately lists NXLIC-MASTER for Master functionality. Verify the licensing status of the existing installation before assuming a replacement card can immediately operate as a Master.
3. Firmware determines the protocol role: The cifX architecture uses loaded firmware to determine the communication protocol and operating role. Preserve the original firmware/configuration information before removing the old card.
4. Card ID setting: The CIFX 50-CO includes a rotary switch for the slot number/card ID on applicable hardware revisions. Record its original setting and reproduce it on the replacement where required.
5. CANopen termination and node configuration: Verify the CAN bus physical layer, node IDs, baud rate, termination, and wiring before commissioning. A correctly detected PCI card does not prove that the CANopen network is correctly configured.
Module 6: Quality Assurance SOP
Before shipment, each Hilscher CIFX50-C0 / CIFX 50-CO should undergo a documented communication-card inspection sequence.
- Step 1 — Part-number verification: Record , part number 1250.500, serial number, hardware revision, firmware information, and card ID.
- Step 2 — OEM anti-counterfeit visual inspection: Inspect Hilscher labels, PCB markings, netX 100 controller identification, PCI connector, 9-pin CANopen connector, LEDs, rotary switch, and manufacturing identifiers. Photograph the complete identification label.
- Step 3 — Physical condition inspection: Check the PCB, PCI edge connector, D-Sub connector, mounting bracket, LEDs, components, and soldered areas for corrosion, contamination, damaged contacts, cracked components, or evidence of previous repair.
- Step 4 — Power verification: Install the card in a compatible PCI test system and verify the required +3.3 VDC ±5% supply condition before communication testing. Monitor current consumption for abnormal behavior.
- Step 5 — Power-on self-test (POST): Start the host system and verify PCI device detection, card initialization, system-status LED behavior, and absence of unexpected diagnostic conditions.
- Step 6 — Driver handshake verification: Install or load the appropriate cifX device driver and confirm that the host operating system detects the communication card correctly.
- Step 7 — CANopen interface verification: Connect the card to a controlled CANopen test network and verify physical-layer communication through the isolated CAN interface.
- Step 8 — Master/Slave communication test: Test the applicable operating role. For Master configurations, verify representative node communication; for Slave configurations, verify communication with an appropriate CANopen Master.
- Step 9 — Baud-rate verification: Test the configured CANopen transmission rate against the intended application, within the supported 10 kbit/s to 1 Mbit/s range.
- Step 10 — LED and diagnostic verification: Record SYS and CANopen status LED behavior under normal communication and representative fault conditions.
- Step 11 — Configuration record: Document firmware, driver version, card ID, CANopen node parameters, baud rate, and Master/Slave role before shipment.
- Step 12 — Final photographic record: Photograph the complete card, Hilscher label, part number, serial number, PCI connector, CANopen D-Sub connector, LEDs, rotary switch, and final packaging.
QA release criterion: A successful PCI detection does not establish CANopen functionality. A fully tested should have documented host recognition, driver initialization, CANopen physical-layer communication, applicable Master/Slave operation, LED diagnostics, and configuration verification. Hilscher’s published specifications identify the card as 1250.500, with PCI connectivity, CANopen Master/Slave capability, optical isolation, and a 1000 VDC tested isolation voltage.



 Start Chat